Hi friends today I going to tell you how to create a Facebook application ID. Before tell it you should know what Facebook app ID is and why you need it. As a developer many times we have to make some app, which may have several functionality depending upon the requirements, for example posting an image/post to you fan page timeline through some scripts. So when a script makes a request to Facebook to post an image then this App ID tells it were to post, so in nutshell App ID is a unique key for you fan page.
I have created several time Facebook app and miss out some of the impotent point as a result my script does not work, so I thought of writing it to my blog so it will help me as well as my readers to create an application ID at an easy. I have tried to make it very simple and to the point with Screen Shots.
Step 1: Facebook App Website
Go to Facebook Developer Website
Login to your Facebook account
Step 2: Create New App
Click on the "Apps" a drop down menu will appear and pick the first option "Create New App".

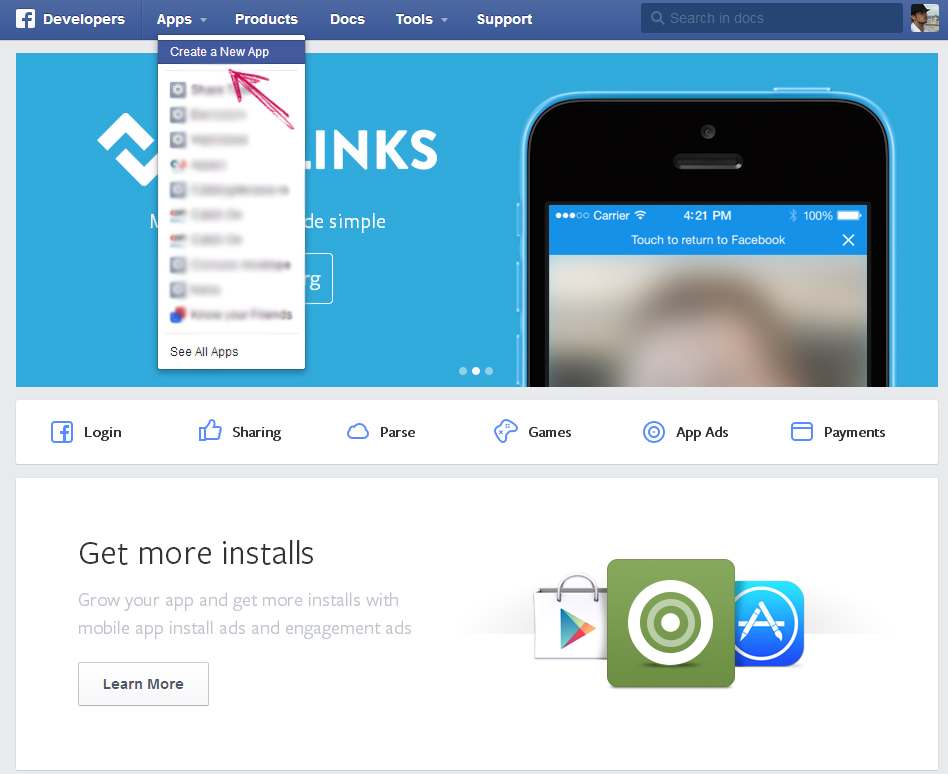
Step 3: Create New App
In a popup window fill the two required fields, and hit "Create App" button
Display Name: write your desired name for the app. Can be any name but should respect some Facebook policies
Category: Pick any one. You can select the "Entertainment" or "Utilitis"

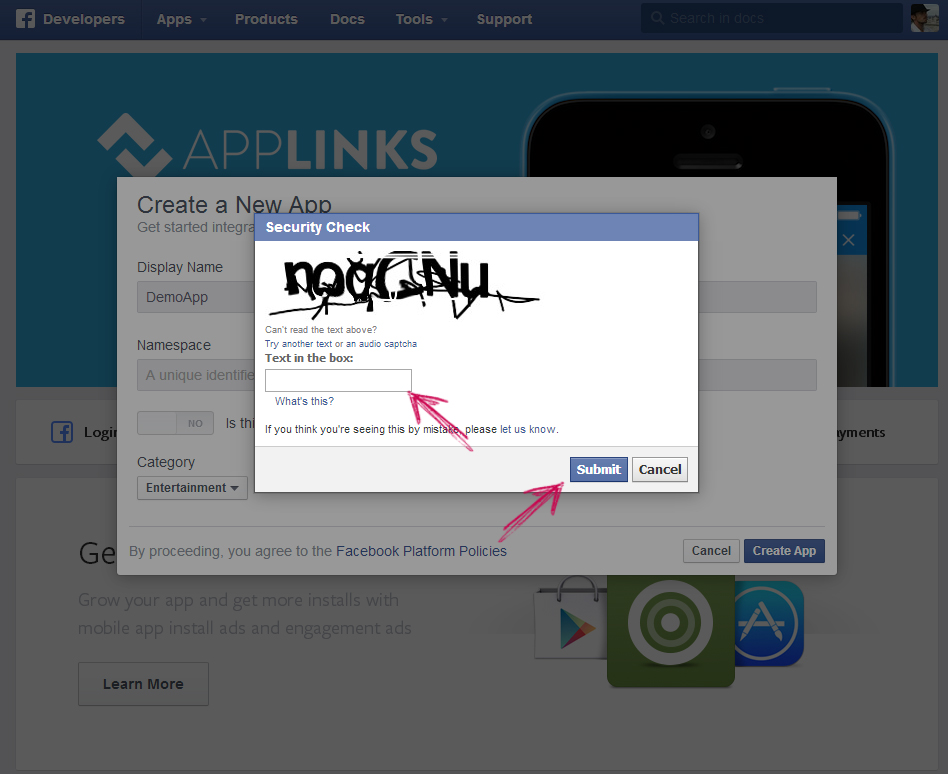
Step 4: Security Check
A popup window will appear, over there enter the right Captcha Text has it is in the below image, and hit submit
Step 5: Dashboard
Now, you've created a new Facebook App. You need to make some additional Settings.
Go on the Settings Tab.
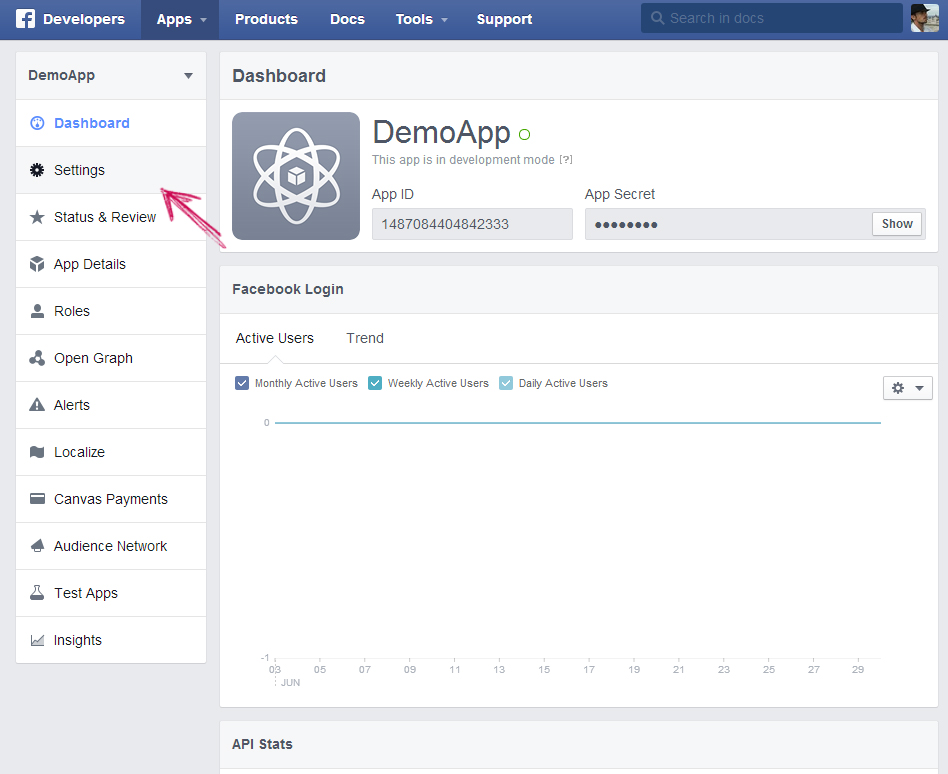
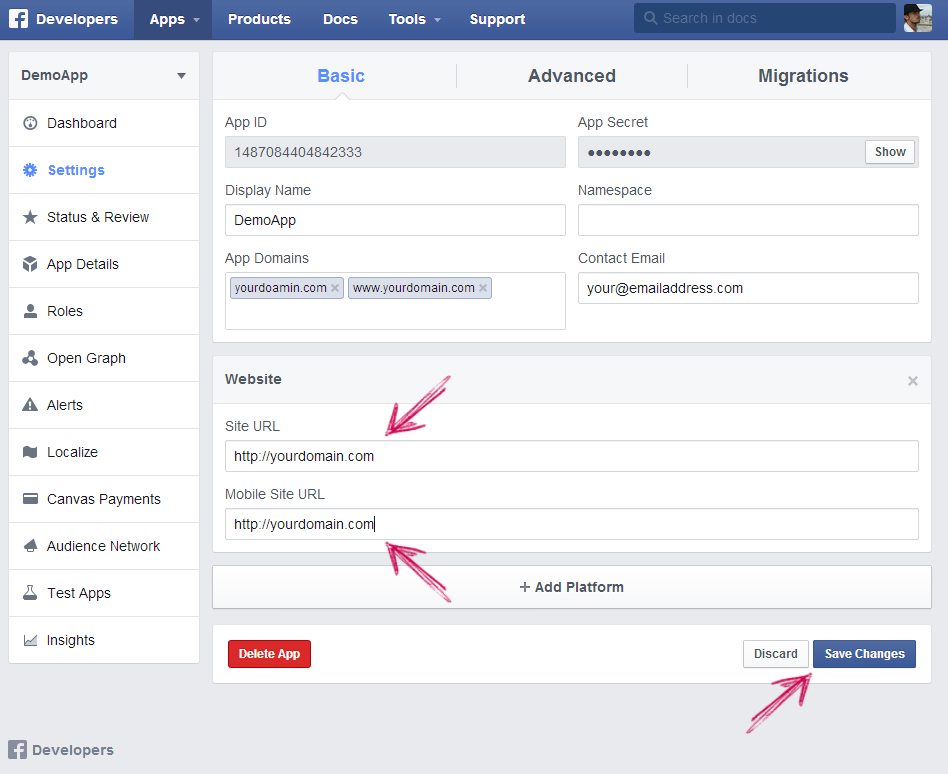
Step 6: Settings
App Domains: enter your site domain. Be sure that you enter your website with and without "www"
Contact Email: This settings is mandatory from a while. Set a valid email address
+Add Platform: click on it for additional settings.

Step 7: +Add Platform
Select the Website option from the popup window. Very Important!

Step 8: Website
Site URL: Set your main site URL using the full name (with http://)
Mobile Site URL: set your main site URL for Mobile devices, especially when you have a different URL for Mobile Devices
Save the Changes
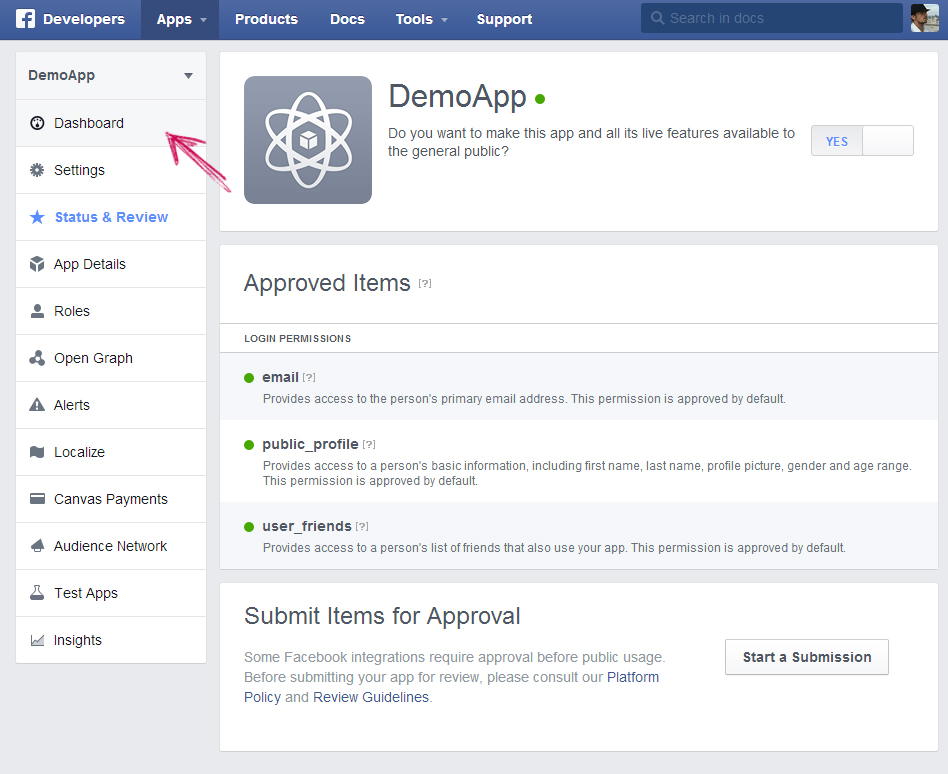
Step 9: Status & Review
Go to Status & Review Tab

Step 10: Status & Review
Activate the App using that button.
The app will not be activated if you didn't set all the previous settings. Important!

Step 11: Status & Review
A popup window will appear, hit "Confirm" button.

Step 12: Dashboard
Now your app is active and public. Go to the dashboard You can use the app for tracking the shares on your website
Step 13: Dashboard
Your website is now an "object" in Facebook’s Open Graph, with its own App ID and there you will see your App ID and App Secret key, use it in your script, Enjoy!

Hoping that the above steps had helped you, if steel in drought then comment below I’ll be there to help you out.
Keep Socializing…..;)

Very nice post. I just stumbled upon you blog and waned to say that I’ve truly enjoyed browsing your blog posts.
After all I’ll be subscribing to your rss feed and I hope you write again very soon!
Quality articles is the secret to invite the people to go to see the site, that’s what this website is providing.
thanks for such a post
Good one 🙂
I needs to spend some time learning much more or understanding more. Thanks for great information I was looking for this information for my mission.
I was able to find good advice from your blog posts.
Outstanding work!
thanks for saving my day.
This information is worth everyone’s attention.
Howdy! This is my first visit to your blog! We are a team of volunteers and starting
a new initiative in a community in the same niche.
Your blog provided us valuable information to work on. You have
done a marvellous job!
Thanks and all the best!
Hello! Someone in my Facebook group shared this site with us so I
came to give it a look. I’m definitely loving the information. I’m bookmarking and will be tweeting this to my followers!
Terrific blog and superb design and style.
I have learn some excellent stuff here. Definitely price bookmarking for
revisiting. I surprise how so much attempt you place to create this
kind of fantastic informative website.
Hello my loved one! I want to say that this post is amazing, great written and include approximately all important infos. I would like to see extra posts like this .